Interesting things to make out of paper—from mathematical models to toys.
Cut Penrose Tiles Quickly
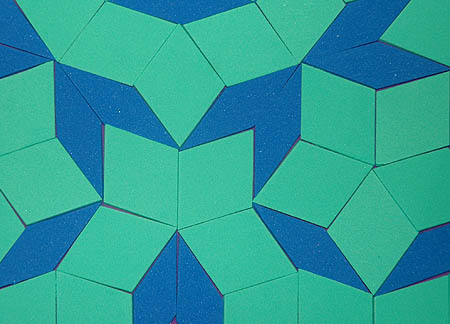
Sir Roger Penrose created tiles that, if placed according to a specific set of rules, create an aperiodic tiling. That is to say the tile pattern isn't made up of a section of tiles that can be duplicated and shifted to fill the plane. There are many excellent sites on Penrose tiling on the internet. This project will give you two patterns to help you create tiles: one pattern is of many tiles you can simply print out and cut out (not the preferred method). The other pattern gives you guides to tape onto a paper-cutter to quickly and easily create many tiles. This will be a two-step process: the first step is to cut the material you are using into strips and the second is to cut the strips into tiles.
Materials
- Tiles made from paper can be frustrating to work with because they can be easily disturbed. I recommend using foam sheets that you can find in craft stores. I used one sold under the trade name Foamies. They come in fun colors, can be cut with scissors or a paper-cutter and have enough thickness and heft to be suitable for use as tiles. I recommend using two colors-one for the thin tiles and another for the thick ones.
Steps
- Tape the page with rows of parallel lines onto your paper cutter so that the last line falls along the cutting edge and the rest of the lines run parallel to it. There are two sets of parallel lines on this pattern. Use the lines on the inside to cut strips to make the skinny tiles. Use the lines on the outside to make fat tiles.
- Place a foam sheet on your cutting board so that the edge of the sheet lines up with the farthest line possible while still overhanging the cutting edge a bit. Cut off this strip and discard it.
- Slide the foam sheet toward the cutting edge so it lines up with the next line and cut a strip.
- Repeat until the sheet is cut into as many strips as you will need.
- Do the same for the other set of parallel lines with a different color foam sheet. Now you will have two sets of strips, one fat and one skinny.
- Cut out the angled guides along the thick lines. You might want to use card stock or thick paper to make the guides to make it easier to line up the foam sheets.
- Tape one guide onto the cutting surface using the rulings marked on the cutting board to make sure that the edge marked "perpendicular to cutting edge" is just that and that the vertex of the triangle falls on the cutting edge. I recommend that you place the vertex a few centimeters away from the back edge of the cutting board to give you room to fit the foam sheets under the cutting blade.
- If you are using the guide with a shallow angle, place a fat strip onto the cutting board along the guide so the end lines up with a marking on the guide. The guide with the steeper angle is for the skinny strips. Cut and discard the first piece.
- Slide the strip to the next closer marking and cut. Repeat
Notes
 (Optional). One way to help you create aperiodic tiling is to mark the tiles with arc of different colors. Cut out the guides to help you draw the arcs using a felt-tip pen or marker.
  Place tiles so the arcs of the same color line up on the adjoining pieces. Following this rule will help you create aperiodic tiling. This may lead to dead-ends. If that happens, undo a few tiles and try other combination.
Comments
comments powered by Disqus